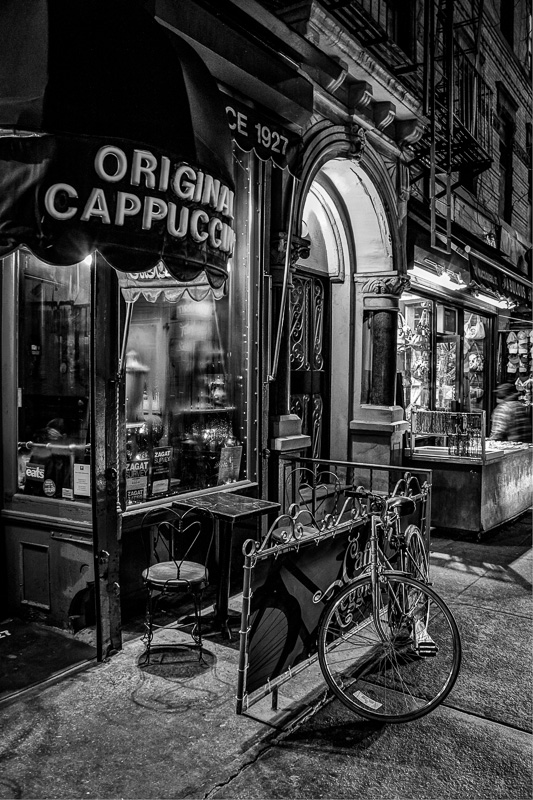
This post is all about night time in New York; how to shoot and post process your images. Just my ideas. Give ’em a whack.
Needless to say, what works in photographing New York City at night, works in every urban environment. Probably any environment really but we’ll use New York City for illustration.
Every city has billions and billions of compositional possibilities. In my eye, there are billions and billions of compositional possibilities within the same scene! OK, maybe not but you get the idea.As you take in the scene you want to shoot, like this one in Greenwich Village, there are going to be two essential challenges to recording the scene so the final output matches what you ‘felt’ that you saw in the first place.
The first challenge is the sheer dynamic range of a given scene; some parts of the scene will be harshly lit and other parts will be in deep shadow. And everything in between.
The second challenge is to render a camera still enough to make sharp, in-focus image details in the shadows.
Let’s take the dynamic challenge first.
For black and white work, digital cameras struggle with a much more limited tonal range (or is it dynamic range?) than you could manage with the old film image capture and develop paradigm, ‘expose for the shadow and develop for the highlights’. That’s because, the way that process worked, you could make an image capture by overexposing the scene slightly. Now you’ve got ‘blown’ highlights, just like digital. But, here’ the alchemy part, you could adjust the developing of the film so that the highlights simply stopped developing as fully as they could while the shadows were given time to come up. Big time tonal range with details in the low shadows and detail in the highlights.
Here’s what I usually do to get a great final print file with a film like tonal range. Even though some new camera’s, like the Fuji X series, are pushing the envelope of dynamic range, I find that taking 3 individual exposures and ‘exposure fusing them’, NOT HDR’d, is the best way to create simple high-resolution file.
On my 60D, I set the exposures to 1 1/3 stop apart. I create my catalogs of new files in Lightroom 5. From LR, I open the file in Fotomatix Pro. I select the ‘Fusion’ default. Mess around in there to see what all the other presets do.
But all I want to do is create a single high-rez file with a large dynamic range and the Default Fusion is simple, great and fast. I bring that file into Silver Efex Pro for my broad black and white processing. I mess around in there until I like it, and save back into Lightroom.
A few tweaks in LR and presto; a positive black and white file with the dynamic range of film.
The other challenge, of making an exposure with an image that contains sharp details in the shadows, is accomplished in one of two ways. Although you can crank up the ISO (3200 – 6400) so that you can even expose shadows while hand holding the camera at the len’s widest aperture, the tripod is still the best option. You can shoot at base ISO at any aperture so you have complete control of your depth of field. I also like the ghostly specters of people that pass into the scene when using longer exposures on a tripod.
And that’s how I approach photography at night in New York City. Now you try it in your city.
As always, please help me by browsing through my ebooks or photo galleries of beautiful New York City black and white photography. There you can select a gorgeous high-resolution print file that you can download for only $20 and print it anywhere youself. And I’ll donate 20% of the purchase price from one of the global humanitarian charities that you can select on checkout.
Until next time, happy shooting.
Bob